Rails + React JS application with CRUD operation
Setting up Rails application with ReactJS usually takes some time. Setting up React Router and Redux for Front-end is an essential part of using React with Ruby on Rails.
This tutorial will help you setup Ruby on Rails application with ReactJS. It will also demonstrate how to setup React Routing and React components to perform basic Create(C), Read(R), Update(U) and Delete(D) operation.
If you are someone, who works with multiple projects and create new projects every now and then, it is troubling to spend time on setting up Ruby on Rails application with ReactJS.
Step 1: Install Ruby and Rails versions
To setup a new Rails 6 application, you need to be on Ruby 2.5.0+. To install Ruby on Rails with RVM, use the command given below. We will use current stable ruby version 2.6.5
rvm install 2.6.5Once Ruby 2.6.5 is installed, install gem for rails 6.0.0 as given below.
gem install rails -v 6.0.0Verify that you have correct Rails version installed with the command given below.
rails --version
# Rails 6.0.0
Step 2: Create a new Rails project
Create a new Rails project with the command given below.
rails new rails-react-js-ssr-setup --database=postgresql --webpack=reactThis will create a new Rails 6 application and install necessary gems required for Rails 6 application.
--databaseoption helps select database to use. We will usepostgresqlas database and--webpackoption is used to select javascript framework. We will usereact.
Webpack react makes sure package.json has
React
dependencies added.
Change directory to newly created Rails application directory.
cd rails-react-js-ssr-setupRun database setup Rails command to get the repository to work with backend.
bundle exec rails db:create db:migrateLet’s commit this repository in VCS (Git) as initial repository code.
git add .
git commit -m "Initial setup."
Step 3: Setup React with react_on_rails gem
Now that we have an inital setup ready with Ruby on Rails 6, let’s setup React with React on Rails gem. We will use latest stable version 11.3.0
Add gem to Gemfile with command given below.
# React setup with Ruby on Rails
gem 'react_on_rails', '~> 11.3.0'
Perform bundle install to install gem as given below.
bundle installOnce this is done, we need to run react on rails initializers as given below.
rails generate react_on_rails:installPerform bundle install after step above,
since it adds gem mini_racer to Gemfile
and
React files for Hello World setup.
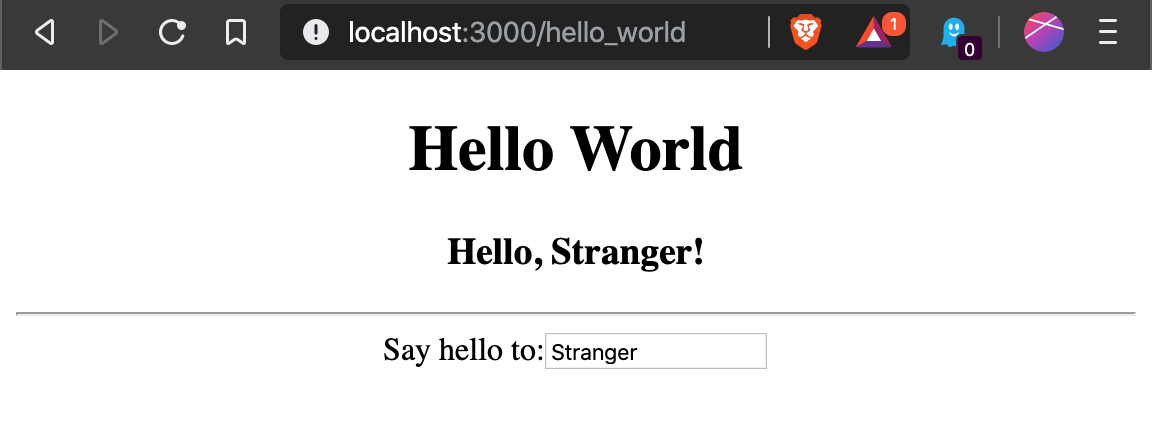
bundle installStep 4: Run Rails server: Hello World
React on Rails comes with Procfile.dev and Procfile.dev-server file.
Thus, we need to install
foreman gem
to
run multiple processes.
In this case,
there are two processes.
- Rails Server
- Webpack server
Procfile.dev-server is given below for the reference.
# You can run these commands in separate shells instead of using foreman
web: rails s -p 3000

# Next line runs the webpack-dev-server
# You can edit config/webpacker.yml to set HMR to true to see hot reloading.
# Note, hot and live reloading don't work with the default generator setup on top of
# the rails/webpacker Webpack config with server rendering.
# If you have server rendering enabled, modify the call to bin/webpack-dev-server line
# so you add `--inline=false` and then CSS is not inlined.
# Otherwise, you will have an error. If you want HMR and Server Rendering, see
# the example in the https://github.com/shakacode/react-webpack-rails-tutorial
client: sh -c 'rm -rf public/packs/* || true && bundle exec rake react_on_rails:locale && bin/webpack-dev-server'
Run the server to view hello world component built in React.
foreman start -f Procfile.dev-serverVisit http://localhost:3000/hello_world to see Hello world in React on web.
Step 5: Setup React Router
To setup React Routing, we need to install react-router and react-router-dom package.
Run the command given below.
yarn add react-router react-router-domThe above command will install
react-router
and
react-router-dom package
and
add it to package.json file.
This will also lock dependencies
in yarn.lock file.
Now, let’s create another rails route to demonstrate react routing.
get 'bye_world', to: 'hello_world#index'We will also add a root route that
points to same hello_world#index
controller action as given below.
root 'hello_world#index'Entire config/routes.rb file looks as given below.
# config/routes.rb
Rails.application.routes.draw do
  root 'hello_world#index'
  get 'hello_world', to: 'hello_world#index'
  get 'bye_world', to: 'hello_world#index'
  # For details on the DSL available within this file, see https://guides.rubyonrails.org/routing.html
end
We have three routes in total.
- Root Route - Points to hello_world#index controller action
- Hello World Route - Points to hello_world#index controller action
- Bye World Route - Points to hello_world#index controller action
As we can see,
all there are two routes pointing
to
same controller#action.
This is delebrately done
to
show how react routing works.
Now, let’s add react route links.
Create a file App.js and Routes.js in app/javascript directory.
touch app/javascript/App.js app/javascript/Routes.jsLet’s add a couple of routes to front-end
as
described in backend config/routes.rb file.
// app/javascript/Routes.js
import React from 'react';
import {
  Switch,
  Route,
} from "react-router-dom";
import HelloWorld from './bundles/HelloWorld/components/HelloWorld';

export default () => {
  return (
    <Switch>
      <Route exact path="/">
        <h3>Root Path Component</h3>
      </Route>
      <Route path="/hello_world">
        <h3>Hello World Component</h3>
      </Route>
      <Route path="/bye_world">
        <h3>Bye World Component</h3>
      </Route>
    </Switch>
  );
}
Let’s mount these routes under Router as given below
in App.js.
// app/javascript/App.js
import React from 'react';
import {
  BrowserRouter as Router,
  Link
} from "react-router-dom";
import Routes from './Routes';

export default class App extends React.Component {
  render() {
    console.log('app being mounted');
    return (
      <Router>
        <div>
        <ul>
          <li>
            <Link to="/">Home</Link>
          </li>
          <li>
            <Link to="/hello_world">Hello World</Link>
          </li>
          <li>
            <Link to="/bye_world">Bye World</Link>
          </li>
        </ul>
        <hr />
        </div>
        <Routes />
      </Router>
    );
  }
}
Restart the foreman server to see React Routing in action. We have three routes in total.
- Root Path - It shows list of routes as unordered list
- Hello World Route Path - It shows Hello World Component
- Bye World Route Path - It shows Bye World Component
Step 6: CRUD operation - Rails APIs
Now, we will demonstrate Create (C), Read (R), Update(U)
and
Delete (D) operations.
Let’s create an
ActiveRecord model
Post to begin with.
rails generate model Post title:string description:text is_published:booleanIt will create files given below.
Running via Spring preloader in process 77236
      invoke  active_record
      create    db/migrate/20191112103934_create_posts.rb
      create    app/models/post.rb
      invoke    test_unit
      create      test/models/post_test.rb
      create      test/fixtures/posts.yml
Let’s add a few entries to posts via seed.
# db/seeds.rb
SAMPLE_POSTS = [{
  title: 'Rails Routes expanded view option',
  description: 'Rails 6 adds support to show rails routes in an expanded format with --expanded option.',
  is_published: true
},{
  title: 'Rails find_in_batches vs find_each',
  description: 'This article discusses how we can use find_in_batches and find_each to query records in batches with ActiveRecord.',
  is_published: true
}, {
  title: 'Rails Routes member vs collection',
  description: 'Member routes act on a member of the resource. Collection routes acts on resources in general.',
  is_published: true
}]

SAMPLE_POSTS.each do |post|
  Post.create(post)
end
Run database migration and seed rake scripts
to
create posts database
and
populate seed data respectively.
bundle exec rails db:migrate db:seedNow that we have model and records for posts in database,
let’s define
routes
and
controller
to perform CRUD operation
on
posts entity.
# app/controllers/api/v1/posts_controller.rb
class Api::V1::PostsController < ApplicationController
  def index
    all_posts = Post.all
    render json: all_posts
  end

  def create
    post = Post.create(post_params)
    render json: post
  end

  def show
    post = Post.find(params[:id])
    render json: post
  end

  def update
    post = Post.find(params[:id])
    post.update(post_params)
    render json: post
  end

  def destroy
    Post.destroy(params[:id])
    head :ok
  end

  private

  def post_params
    params.permit(:title, :description, :is_published)
  end
end
Let’s add routes to access Create, Read, Update and Delete operations externally.
# config/routes.rb
namespace :api do
  namespace :v1 do
    resources :posts, only: [:index, :create, :show, :update, :destroy]
  end
end
We have used resource
to
create routes
and
have specified exact four routes
that
we want via only option.
Please find why we have used
resource and not resources
To make sure,
we have routes correctly set up
and
they return response
for
posts resource,
let’s send a
cURL Request
to fetch a list of posts.
curl http://localhost:3000/api/v1/postsThis command returns reponse as given below.
[{
	"id": 1,
	"title": "Rails Routes expanded view option",
	"description": "Rails 6 adds support to show rails routes in an expanded format with --expanded option.",
	"is_published": true,
	"created_at": "2019-11-12T10:48:14.231Z",
	"updated_at": "2019-11-12T10:48:14.231Z"
}, {
	"id": 2,
	"title": "Rails find_in_batches vs find_each",
	"description": "This article discusses how we can use find_in_batches and find_each to query records in batches with ActiveRecord.",
	"is_published": true,
	"created_at": "2019-11-12T10:48:14.242Z",
	"updated_at": "2019-11-12T10:48:14.242Z"
}, {
	"id": 3,
	"title": "Rails Routes member vs collection",
	"description": "Member routes act on a member of the resource. Collection routes acts on resources in general.",
	"is_published": true,
	"created_at": "2019-11-12T10:48:14.261Z",
	"updated_at": "2019-11-12T10:48:14.261Z"
}]
We are ready with backend APIs. Let’s create front-end components to use these backend APIs and perform CRUD operation.
Step 7: CRUD operation - React components
First, we will create a component
to
list down all the available posts.
Create a new directory under
app/javascript/bundles
with
name posts
to create React files for posts entity.
Component to list Posts
// app/javascript/bundles/posts/index.js
import React from 'react';

export default class PostsList extends React.Component {
  constructor(props) {
    super(props);
    this.state = { posts: [] };
  }

  componentDidMount() {
    fetch('/api/v1/posts').
      then((response) => response.json()).
      then((posts) =>  this.setState({ posts }));
  }

  render() {
    const { posts } = this.state;
    return (
      <div>
        <h3>All Posts</h3>
        <table>
          <thead>
            <tr>
              <th>ID</th>
              <th>Title</th>
              <th>Description</th>
              <th>Is Published</th>
            </tr>
          </thead>
          <tbody>
          {
            posts.map((post) => {
              return (
                <tr key={post.id}>
                  <td>{post.id}</td>
                  <td>
                    <Link to={`/posts/${post.id}`}>
                      {post.title}
                    </Link>
                  </td>
                  <td>{post.description}</td>
                  <td>{post.is_published ? 'Yes' : 'No' }</td>
                </tr>
              )
            })
          }
          </tbody>
        </table>
      </div>
    );
  }
}
This component does following things:
- Initializes
poststo an empty array in the constructor - Fetches posts to list from backend API that created in step above.
- Render method iterates over
postsfrom React state and displays them in a table format.
Let’s change React route to open Posts listing component at the root path.
// app/javascript/routes.js
import React from 'react';
import {
  Switch,
  Route,
} from "react-router-dom";
import HelloWorld from './bundles/HelloWorld/components/HelloWorld';
import Posts from './bundles/posts/index';

export default () => {
  return (
    <Switch>
      <Route exact path="/">
        <Posts />
      </Route>
      <Route
        path="/posts/:id"
        exact
        component={PostDetails}
       />
    </Switch>
  );
}
Component to view a Post
We have a list of Posts displayed at the root path of the application. Let us create a new React component to display an individual post.
// app/javascript/bundles/posts/PostDetails.js
import React from 'react';

export default class PostDetails extends React.Component {
  constructor(props) {
    super(props);
    this.state = { post: {} };
  }

  componentDidMount() {
    const { match: { params: { id } } } = this.props;
    fetch(`/api/v1/posts/${id}`).
      then((response) => response.json()).
      then((post) => this.setState({ post }));
  }

  render() {
    const { post } = this.state;
    return (
      <div>
        <div>
          <label> Title </label>
          <p> {post.title} </p>
        </div>

        <div>
          <label> Description </label>
          <p> {post.description} </p>
        </div>

        <div>
          <label> Is Published </label>
          <p> {post.is_published} </p>
        </div>
      </div>
    );
  }
}
This component does following things.
- Initialize
postas an empty object in a constructor - Fetch the post in question in componentDidMount lifecycle event based on post ID received in props
- Render method returns HTML that prints title, description and is_published values
Create a new Route
for the post details page as given below
in config/routes.rb for backend
and
in Routes.js for React front-end.
get 'posts/:id', to: 'hello_world#index';Entire config/routes.rb looks as given below.
Rails.application.routes.draw do
  namespace :api do
    namespace :v1 do
      resources :posts, only: [:index, :show, :update, :destroy]
    end
  end
  get 'posts/:id', to: 'hello_world#index';
  root 'hello_world#index'
end
We have removed hello_world and bye_world routes now.
For react routes, add in app/javascript/Routes.js.
import PostDetails from './bundles/posts/PostDetails';
//.
//.
<Route path="posts/:id" component={PostDetails}>
Entire routes files looks as given below.
// app/javascript/routes.js
import React from 'react';
import {
  Switch,
  Route,
} from "react-router-dom";
import HelloWorld from './bundles/HelloWorld/components/HelloWorld';
import Posts from './bundles/posts/index';
import PostDetails from './bundles/posts/PostDetails';

export default () => {
  return (
    <Switch>
      <Route exact path="/">
        <Posts />
      </Route>
      <Route
        path="/posts/:id"
        exact
        component={PostDetails}
       />
    </Switch>
  );
}
We have removed hello_world and bye_world routes now.
Component to delete a post
To perform put, patch, delete requests
from API,
we need to add following code to app/controllers/application_controller.rb
# app/controllers/application_controller
class ApplicationController < ActionController::Base
  protect_from_forgery with: :null_session
end
Let’s add a link to delete a post from Posts list page. We will add two things.
- Extra column in a table to show delete action
handleDeletecallback that will send an ajax request to delete a record
The posts list page component is given below after the change mentioned above.
// app/javascript/bundles/posts/index.js
import React from 'react';
import { Link } from 'react-router-dom';

export default class PostsList extends React.Component {
  constructor(props) {
    super(props);
    this.state = { posts: [] };
  }

  componentDidMount() {
    this.fetchPostsList();
  }

  fetchPostsList = () => {
    fetch('/api/v1/posts').
      then((response) => response.json()).
      then((posts) =>  this.setState({ posts }));
  };

  handleDelete = (postId) => {
    fetch(`/api/v1/posts/${postId}`, { method: 'delete' }).
      then((response) => {
        alert('Post deleted successfully')
        this.fetchPostsList();
      });
  }

  render() {
    const { posts } = this.state;
    return (
      <div>
        <h3>All Posts</h3>
        <table>
          <thead>
            <tr>
              <th>ID</th>
              <th>Title</th>
              <th>Description</th>
              <th>Is Published</th>
              <th>Actions</th>
            </tr>
          </thead>
          <tbody>
          {
            posts.map((post) => {
              return (
                <tr key={post.id}>
                  <td>{post.id}</td>
                  <td>
                    <Link to={`/posts/${post.id}`}>
                      {post.title}
                    </Link>
                  </td>
                  <td>{post.description}</td>
                  <td>{post.is_published ? 'Yes' : 'No' }</td>
                  <td>
                    <button onClick={() => this.handleDelete(post.id) }>
                      Delete
                    </button>
                  </td>
                </tr>
              )
            })
          }
          </tbody>
        </table>
      </div>
    );
  }
}
This component does things mentioned below.
- Adds a handleDelete callback which send delete post ajax request
- Javascript alert is shown after post is deleted.
Component to Create a new post
To create a new post, we need a React component
that
shows inputs for title, description and is_published.
We have already added backend route in config/routes.rb.
Let us add React Route to create a post.
<Route
  path="/posts/new"
  exact
  component={CreatePost}
  />
Place it before /posts/:id route, so that it gets matched first.
Now, create a component that will do following things.
- Show inputs for title, description and is published fields
- Maintain input values in a state
- Submit values to create post API to create a post
- Redirect to root path to see newly added post on posts list
// app/javascript/bundles/posts/CreatePost.js
import React from 'react';
import {Redirect} from 'react-router-dom';

export default class CreatePost extends React.Component {
  constructor(props) {
    super(props);
    this.state = {
      title: '',
      description: '',
      is_published: true
    }
  }

  handleInputChange = (event) => {
    this.setState({ [event.target.name]: event.target.value });
  }

  createPostRequest = (event) => {
    console.log('this.state', this.state);
    fetch('/api/v1/posts', {
      method: 'post',
      body: JSON.stringify(this.state),
      headers: { 'Content-Type': 'application/json' },
    }).then((response) => {
      alert('Post created successfully');
      location.href = '/';
    });
  }

  render() {
    const {title, description, is_published} = this.state;
    return (
      <div>
        <h3>New Post</h3>
        <div>
          <label>Title: </label>
          <input
            type='text'
            name='title'
            value={title}
            onChange={this.handleInputChange}
            />
        </div>
        <div>
          <label>Description: </label>
          <input
            type='text'
            name='description'
            value={description}
            onChange={this.handleInputChange}
            />
        </div>
        <div>
          <label>Is Published: </label>
          <input
            type='text'
            name='is_published'
            value={is_published}
            onChange={this.handleInputChange}
            />
        </div>
        <button onClick={this.createPostRequest}>Create</button>
      </div>
    );
  }
}
Component to update a post
Add a Rails routes to show edit post component as given below.
// config/routes.rb
get 'posts/:id/edit', to: 'hello_world#index';
Let’s add a React route to edit a post as given below.
// In app/javascript/Routes.js
<Route
  path="/posts/:id/edit"
  exact
  component={UpdatePost}
  />
Add a link to UpdatePost component
from
posts list component.
// app/javascript/bundles/post/index.js
<Link to={`/posts/${post.id}/edit`}>
  Edit
</Link>
Let’s create a component to update existing post.
- Component shows existing values when component is mounted
- It maintains any changes to values for the attributes on a post
- Sends an update request to update post on click of a submit button
// app/javascript/bundles/posts/UpdatePost.js
import React from 'react';

export default class UpdatePost extends React.Component {
  constructor(props) {
    super(props);
    this.state = {
      title: '',
      description: '',
      is_published: true
    }
  }

  componentDidMount() {
    const { match: { params: { id } } } = this.props;
    fetch(`/api/v1/posts/${id}`).
      then((response) => response.json()).
      then((post) => this.setState({ ...post }));
  }

  handleInputChange = (event) => {
    this.setState({ [event.target.name]: event.target.value });
  }

  updatePostRequest = (event) => {
    fetch(`/api/v1/posts/${this.state.id}`, {
      method: 'put',
      body: JSON.stringify(this.state),
      headers: { 'Content-Type': 'application/json' },
    }).then((response) => {
      alert('Post updated successfully');
      location.href = '/';
    });
  }

  render() {
    const {title, description, is_published} = this.state;
    return (
      <div>
        <h3>New Post</h3>
        <div>
          <label>Title: </label>
          <input
            type='text'
            name='title'
            value={title}
            onChange={this.handleInputChange}
            />
        </div>
        <div>
          <label>Description: </label>
          <input
            type='text'
            name='description'
            value={description}
            onChange={this.handleInputChange}
            />
        </div>
        <div>
          <label>Is Published: </label>
          <input
            type='text'
            name='is_published'
            value={is_published}
            onChange={this.handleInputChange}
            />
        </div>
        <button onClick={this.updatePostRequest}>Update</button>
      </div>
    );
  }
}
Source Code
You can find source code of the repository created illustrating everything from this blog post.
Ruby on Rails 6 + ReactJS CRUD Application
References
- React on Rails gem
- ReactJS
- Ruby version requirement for Rails 6
- Rails 6.0.0
- react-router
- react-router-dom
- Seed data in Rails
- Rails Routes Resource vs Resources
- cURL Request
- Javascript Fetch API
- React state management
Subscribe to Ruby in Rails
Get the latest posts delivered right to your inbox

